Designing Knit Textiles
With the various knitting machinery available on the market, knit design capabilities are almost endless. The three basic knit stitches, jersey, float, and tuck, offer infinite design potential when mixed with novel yarns, knit textures, and technological innovations. In this section, we will review process options for designing knit textiles.
Defining the Product
When beginning to design knits for a collection, several pathways may be followed. You may have fabric development from a mill, you may be working from a bought sample found in the market, or you may have a textile designer who will design the fabric from scratch. Whichever path you use, it’s best to start with understanding the end use of the fabric. Consider the following questions in your planning phase:
- What is the target market for this product?
- What is the classification for the end use of the fabric? Outerwear, intimate, activewear, sportswear, etc.?
- What are the functionality and performance attributes the fabric needs to bring to the garment?
- What price does the fabric need to be at to meet the product margin?
- What is the aesthetic direction for the fabric?
Determine Yarn, Construction, and Cost
Fabric cost drives about 60% of the total garment price, so it is important to start off by working with a fabric that will be in the price range to reach your margin goal.
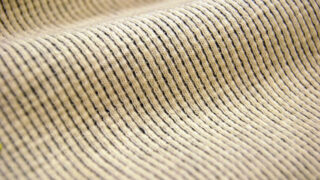
Yarn is the first factor to consider. In cotton yarns, several levers determine yarn cost. The first is the yarn size. A finer yarn will be more expensive than a coarser yarn. For instance, a 60s single cotton yarn is more expensive than a 30s single. Another factor is the staple length. Pima or long-staple yarns have long fibers, which result in a naturally smooth fabric finish compared to shorter staple yarns like Upland cotton. Yarn spinning also determines cost, as ring-spun yarns cost more than open-ended yarns.
The next factor to consider is the knit construction. With the yarn size selected, the knit construction will determine the productivity and weight of the fabric. Jersey fabric is the fastest to knit, whereas a fabric with a more complicated knit structure will be slower to knit based on the alternating needle action of the machine.
Depending on which path you are using to develop and design the fabric, the knit construction and yarns used might already be dictated by the mill you sourced the fabric from, or you may be starting from scratch with your own development. Whichever process you follow, determine the construction and yarn first and then move on to the next lever that will impact fabric cost, the visual design of the fabric.
Designing the Fabric
With a clear direction on the fabric construction, adding pattern and color to achieve the final design will also impact cost. With knit fabrics, design is determined by the type of machine being used and its capabilities. In this following section, we will present different pattern techniques and the machines that execute them in production.
Stripes
Circular knit stripes can be broken down into three categories: feeder, auto, and engineered. It’s important to remember that these stripe layouts can be applied to any knit construction possible on a circular and flatbed machine such as jersey, pique, interlock, rib, etc.
Feeder
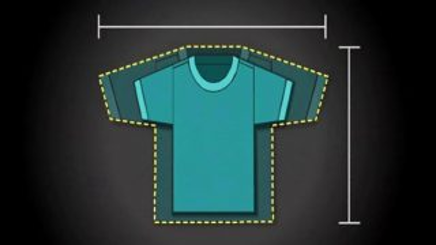
Feeder stripes have repeat layouts that are less than 5 centimeters or approximately less than 2 inches (depending on the number of feeders on the machine). Feeder stripes have very high productivity with low production costs. In the example shown, the feeder stripe repeat fits on 30 feeds, so the stripe pattern repeats twice on this 60-feed machine. The maximum height stripe for this machine would be a stripe with 60 individual feeds needed for 1 repeat.
A typical feeder knitting machine has about 90 feeds, so it is possible to have a feeder stripe layout with 90 individual positions for one repeat.
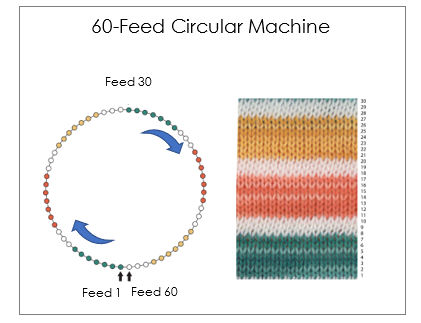
Example of a feeder stripe on a 60-feed circular knit machine.
To maximize efficiency, ensure the stripe layout is evenly divisible by the number of feeds. For instance, in the illustration shown, if the stripe layout used 25 feeds for one pattern repeat, then with two repeats in the 60-feed machine, ten yarn feeds would be left unused. This results in the machine’s productivity not being maximized.
Auto
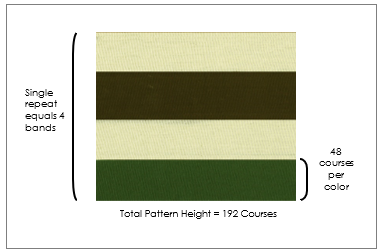
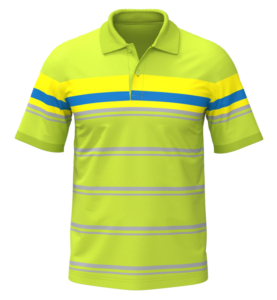
An example of an auto stripe that has three yarn colors and 48 courses per stripe.
When stripe repeats are larger than 5 centimeters, they require the use of a different circular knitting machine called an Automatic Striper. In the example shown, the stripe layout has three yarn colors and requires four stripes for a full repeat.
Each stripe comprises 48 courses, so the total pattern height adds up to 192 courses. Auto stripes can have much larger repeats greater than the two-inch limitation from feeder stripe machines. With larger stripe repeats, garment costs increase because of the stripe matching and marker efficiency.
Auto stripe machines have a 4-finger selection per feed. This allows up to 4 yarn colors to be switched in and out for each feed depending on the stripe layout. This allows for great flexibility in color selection when designing the stripe repeat.
Engineered
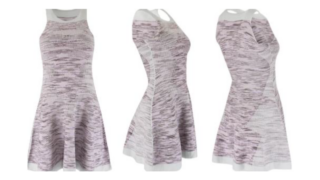
Auto stripe machines also have the capability to create engineered stripes. Engineered stripes are layouts that do not repeat for the full length of the garment. In the illustration shown, notice that the stripe layout does not repeat on the front, back, or sleeves.
Each finger is designated a different color yarn for 1 feed. Colors can be switched out automatically depending on the stripe layout.
An example of an engineered stripe where the
layout does not repeat on the length of the body.
This pattern design requires the stripe repeat to be about 36 inches tall (depending on the garment grading.) Because of this placement and the repeat size, engineered stripes are the most expensive stripe layouts to produce.
Jacquards
Feeder and automatic circular knit machines have limitations regarding pattern designs. Due to the horizontal knitting rotations, stripes are the primary pattern motif for these machines.
Computerized jacquard circular machines offer more design capabilities due to the nature of each needle moving independently based on the programmed pattern.
This allows for geometric and organic shapes to be possible in circular knitting. Jacquard knitting can be applied to single and double-knit circular knit machines and single and double flat-bed machines.
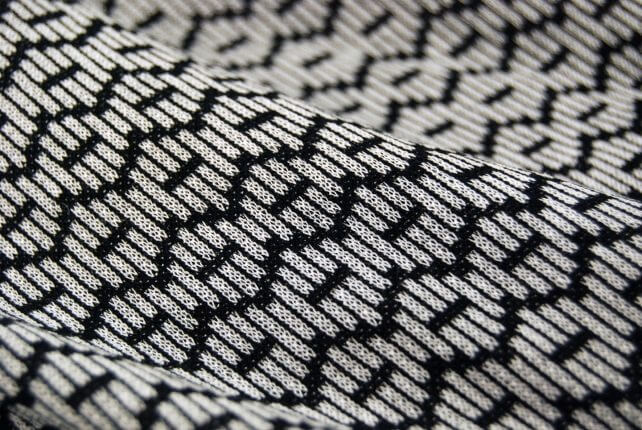
Examples of jacquard knit patterns from FABRICAST™ archive.
Intarsia
Intarsia is another technique for creating pattern work on flat-bed machines. Intarsia knitting is a coloration method where two or more colored yarns overlap along the course of the fabric to form separate fields of color within a design motif. Each colored yarn feeds through a different carrier that knits across to the adjoining color. For each color change, the color stops, tucks, and then a new color starts.
The advantages of the intarsia technique are that it uses less yarn than a double-knit jacquard, and it does not have floats in the back like a single-knit jacquard, which can snag.
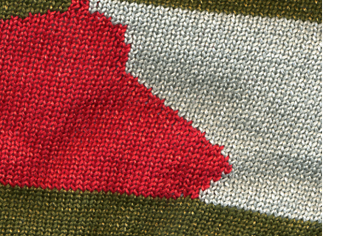
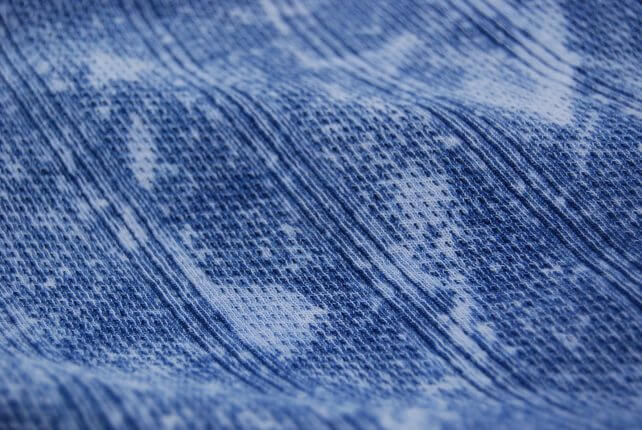
Technical Face
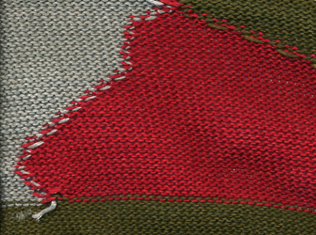
Technical Back
Example of the intarsia technique for pattern design.
CAD Designs
The final step is taking the fabric construction and knowledge of knit machines to design the final CAD artwork that gets passed to the mill for fabric development.
The CAD can be approached in several manners. In the illustration shown, the stripe CAD layout can be done in a 2D program by laying out the stripe repeat, the color positions, and marking the height of each stripe. The mill can then take this CAD artwork and interpret it for the knitting machine that will produce the fabric. A second option uses a more technical CAD program that allows for the input of stitch, gauge, and yarn size. Several of these CAD programs can be directly linked to the specific machine that will be knitting the fabric, or these CAD outputs can provide more accurate technical information, minimizing errors on the mill side.
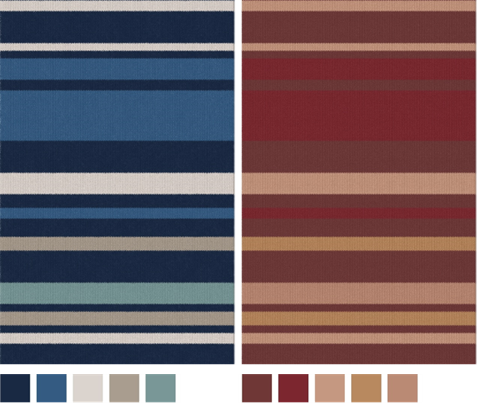
Example of a CAD layout with stripe repeat and yarn positions. Additional
notations of yarn size, gauge, and stripe height can be added for greater accuracy.
For more elaborate patterns like jacquards, the same process can be followed by providing a 2D CAD that the mill can interpret or by using a CAD program for developing and designing jacquards. This stage depends on the resources of the apparel brand and the designer.
Knit Downs and Lab Dips
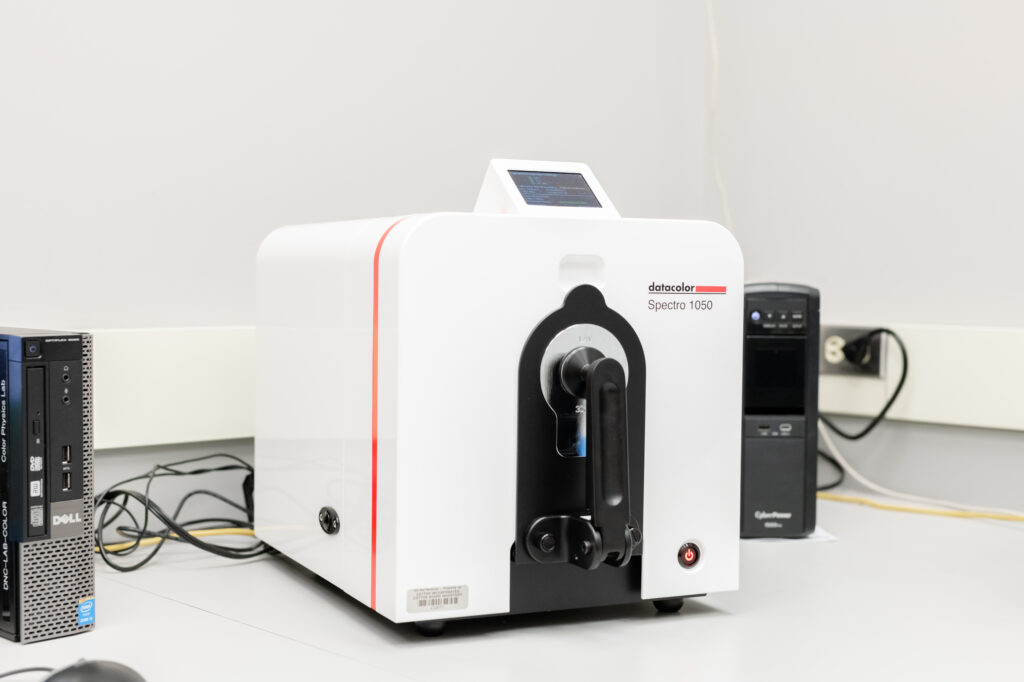
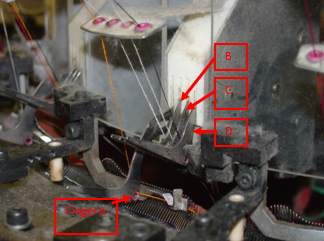
A spectrophotometer is used to take specific color measurements of the lab dip
Once the design has been finalized and the artwork has been passed to the mill, the mill will begin lab-dipping all the yarns to match the specified colors in the CAD and will produce a sample knit-down. A knit-down is a sample of the knit fabric usually made on smaller versions of the machines specifically for sampling.
Often, to save time, the mill may provide a knit-down using available colors to get layout approval from the designer before moving into final colors. The colors are usually in the process of being approved at the same time by the brand colorist or designer.
It is essential to review the knit down to make sure the construction of the knit fabric has been executed as desired. This is the stage to fine-tune the properties of the fabric for stretch, drape, and pattern design. Understand that hand feel will knot be possible at the knit-down stage as the fabrics have not gone through the final finishing process which is done when actual sample yardage is produced.
When the lab dips and knit downs have been approved, the mill proceeds into sample yardage to make the garments.
Fabric Approvals and Quality Assurance
Remember our list of questions to consider at the beginning of the design process? At this stage, we now answer those questions to approve the fabric. Fabric performance and garment construction are intertwined. The fabric must complement what the garment needs to perform visually and structurally.
Any last-minute adjustments must be made before the fabric moves into bulk production. At this stage, lab dips or fabric hand feel might need to be adjusted. The fabric
Fabric performance and garment construction are intertwined.
also needs to meet brand requirements for testing such as color fastness, shrinkage, and pilling.
If the fabric does not pass quality testing, then there will be a need to modify the fabric further. Usually, this does not require changing the construction of the fabric too dramatically as any major callouts should have come up in the knit-down stage. For instance, if the shrinkage of the fabric is higher than the quality standard, but the nature of the stitch (such as a thermal) naturally has a high shrinkage, the garment pattern can be scaled longer to accommodate for the shrinkage.
Once the sales sample fabric is approved, the mill will move into bulk production. It is customary to request cuttings from the bulk fabrics to make one last double-check before the garment goes into the market.
Fittings
At the sample yardage stage, the fabrics should be in the desired construction, pattern design, and finish to move into bulk production if adopted into the line. The designer must not only approve the fabric in the fabric stage but also look at the fabric performance in the garment stage.
Typically, prototypes are made in available fabrics, especially for new fabric developments. Fittings at the sales sample stage determine if the developed fabrics are successful. In the fitting sessions, the designer reviews the garment with the technical designer. Pattern adjustments may need to be made based on the fabric
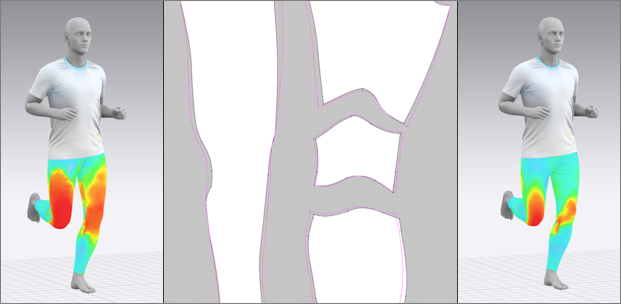
Example of a 3D fitting with the before and after pattern adjustments to minimize fabric strain.
properties of the final knit fabric.
Fittings usually occur with a live-fit model or on a dress form. With digital product creation, also known as DPC, fittings can now happen virtually using 3D models and garments. In this illustration, the image on the left shows how the leggings fit excessively tight, and by modifying the flat pattern, the strain was reduced to the desired amount. DPC requires several important factors to be effective. The actual fabric of the garment must be digitized with the correct physics to simulate the fabric physics properly in the 3D fit programs. The flat patterns for the garment must also be digitized patterns used by the manufacturer so that all the technical specifications are accurate. Lastly, the avatar used in the fitting must be an exact duplicate, also known as a digital twin, of the brand’s fit model or dress form.
Artwork Files for Knitwear Design
In this webinar, Alexis Mondragon—technical designer, knitwear specialist, and sweater consultant for Cotton Incorporated—takes a deeper look at:
- Artwork and body mapping solutions using Adobe Photoshop
- How to format artwork files that are compatible with flat bed and circular knitting machines
- Knitwear design utilizing Cotton Incorporated’s FABRICAST™ collection