Designing Wovens
Choices That Impact Weave Type
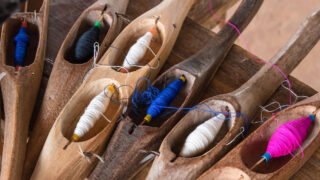
The selection of yarn, and the size and texture of the yarn, can dictate what type of weave can be used. Different sizes and textures of yarn such as chenille or boucle yarns can greatly affect the appearance of the fabric. The fiber content of the yarn can also affect the appearance of the final product. Yarns with a high sheen such as mercerized cotton, polyester, or rayon will produce a fabric that has a high sheen. Fabrics containing black and natural yarns can be overdyed so that the natural yarn takes on any color while the black yarn remains black.
Blended yarns can also be used to create surface interest as well. Different fibers such as cotton and rayon react differently to the same dye. Other combinations of fibers require different types of dyes allowing many different color variations of the same fabric to be produced. The fabric can be cross dyed in which the cotton fiber dyes one color and the other fiber dyes another color. They can also be union dyed where two different dyes are used to dye the two different fibers the same color.
Fabric Design Illustrations
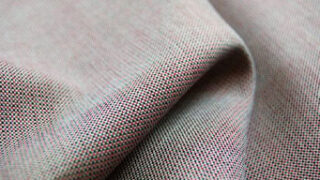
Fabric designs are illustrated in a simple graphic manner, with blocks representing the placement of the yarns. Each vertical column of blocks represents a warp yarn, and each horizontal row of blocks represents a weft yarn. When a warp yarn weaves over a weft yarn and appears on the face of the fabric, a block is filled in or marked with a symbol (such as an X). Each filled-in block represents a warp yarn showing on the face of the fabric and each block left blank represents a weft yarn showing on the face of the fabric. The full graphic rendering will give an explanation of how the fabric will be woven.
Technical Design
Once the weave has been determined, the design can be entered into the computer. A technical design is developed and is composed of the elements the weaver uses to construct the fabric. The three fundamental elements are the weave design, draw-in draft, and chain plan.
The draw-in draft is typically shown at the top of a weave sheet. It determines the order in which the warp yarns are drawn through the harnesses. Used by the drawing-in operator, it ensures proper alignment of the warp yarns for the desired pattern.
Drawing-in is a time-consuming and costly process. When designing fabrics, it is always more cost-effective for mills to change the chain or CAM plan while using the existing drawing-in draft and warp end count.
The chain plan or peg plan tells the machine when the individual harnesses will be raised. This is typically shown parallel to the weave design. The weave is the result of combining the peg plan and the draw. Changes in either the chain or the draw will result in a change in the overall design.
The next step is to determine the construction of the fabric. This refers to the number of ends and picks within a square inch of the fabric. To create a dense fabric, you would want a large number of ends and picks per inch. To create a more sheer fabric, you would want to have a small number of ends and picks per inch. The construction is also dependent on yarn size. For a fabric made of fine yarn, there will need to be a higher end and pick count to achieve the desired coverage, whereas a coarser yarn would require fewer ends and picks to achieve the same degree of cover.
The next step is to define the yarns in the weave. Yarns can be chosen from the yarn library of the computer program and then adjusted to best match the actual yarns that will be used. Many different types of yarn can be selected from basic cotton yarn to cotton plied yarn, to a boucle yarn, to a chenille yarn to a spaced dyed or slub yarn. Once the yarn is selected, the yarn size is defined, along with the color and twist multiple.
Once the yarns are defined, they are assigned to the weave. The pattern repeat is determined and laid out along the warp and the weft. Once the weave, construction, and yarns are defined, the fabric is ready to be simulated. The computer takes the weave, construction, and yarn information and translates it into an image resembling the woven fabric. This is a preview of what the real woven fabric will look like. Adjustments to the weaves or to the yarns can be made at this time before the design is transferred to the loom.
Once the information has been entered and the simulation has been approved, the file can be sent electronically to the loom. Once the project reaches the weave room a sample, called a head end or strike off, is woven. Usually, a few yards are woven and sent back to the designer to approve or make any final adjustments. Once the head end is approved, the fabric is woven.